2011-05-23

Sword Antiquing


A $70 carbon steel Practical Hand and Half served as the basis of an antiquing experiment. After stripping the fake leather off I disassembled the hilt by removing a small portion of the wood handle, tapped the pommel down about 1/8" then filed the mushroomed peen off with a dremmel. The wooden handle was epoxied to the tang and required some careful work but managed to come off in a reusable form.
The blade was antiqued with a vinegar salt solution of approx. 4 tsp salt to 1 cup vinegar that was sprayed as a fine mist and allowed to corrode the blade for 18 hours. The heavily corroded blade was washed with soap and water and a brillo pad and then most of the rust was polished away, leaving a heavily worn but cared for patina. A satin sheen was applied on the high points with a dremmel satin buffer mandrel.
The cross guard and pommel were fired in an oven at 500F for 2 hours to produce a slight golden bronze tone, then hot quenched in vegetable oil.
The custom sword handle is cord wrapped 2 oz leather over waxed thread with latigo risers.

2011-05-21

Customized CAS Hanwei Practical Single-Hand Sword


I'm still in the experimental phase so I went quick and dirty again. I'm more or less satisfied with the results of this project given the money and modest time investment. I'm almost ready to make a bit more serious attempt.
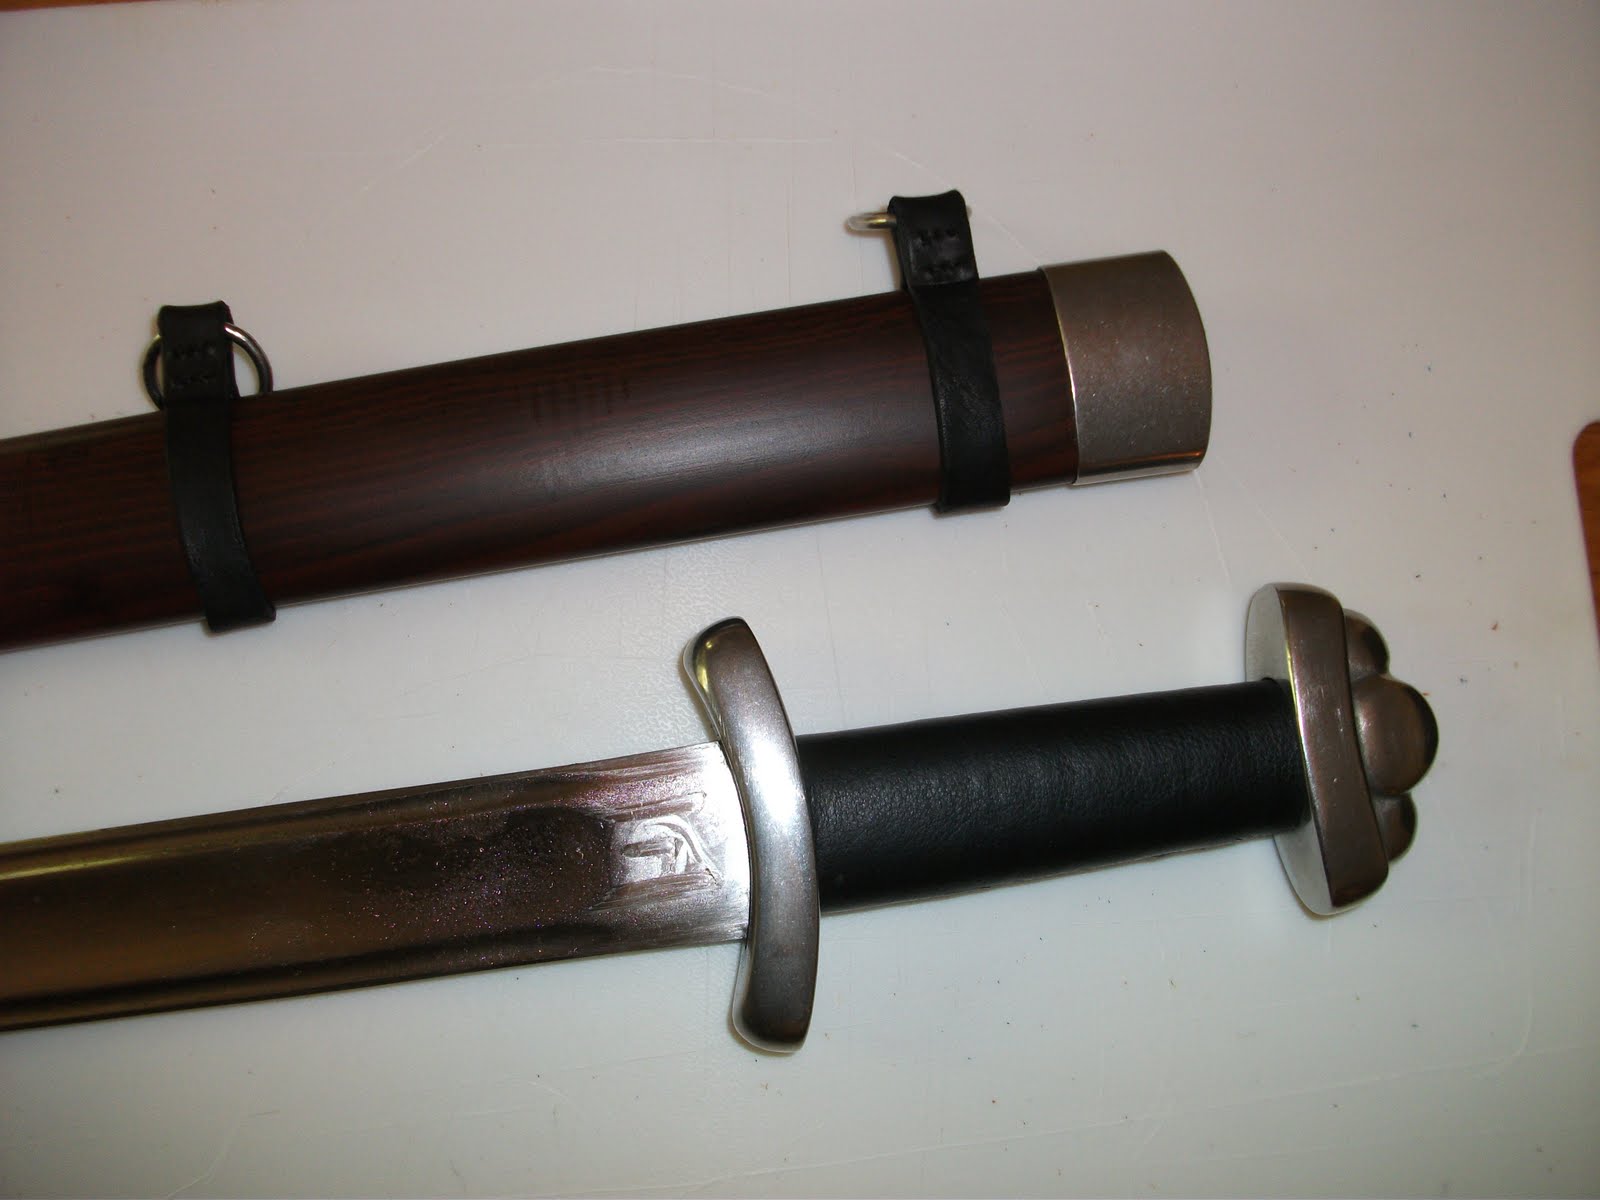
I stripped off the fake leather grip to reveal a hardwood handle with pronounced lathe work. Rather than rework the wood I decided to simply cover it. I measured and cut 2 oz leather to fit then soaked it in hot water for about 5 minutes. I did not skiv and overlap the leather so again the lacing looks a bit amateur, but it is mostly straight. I will be pre-dying and skiving all seams and gluing the leather down in the next few handle projects, and if I get another lathed handle like this I will rework or replace the wood.
While the grip leather was wet I wrapped the handle with cord and brought out the woodwork detail. After dying the details were hard to see, so I lightly weathered the grip with steel wood then applied gel antique. Finally I added two thin bands of lighter leather at both ends.
Rather than create a wood core scabbard from scratch I just wrapped the stock fiberglass scabbard in 4 oz leather, and left a small amount of the throat and chape exposed. Next time I will make a new wood core. I would have preferred 2 oz leather but the price of 4 oz was 1/3 the cost. I carefully measured the scabbard diameter at 6 inch intervals and cut a piece of leather with an extra 1/4 inch width. The leather was very stiff so I had to soak it in a pot of warm water for about 10 minutes before I could wrap it.
I glued on 2 mm cord risers and wrapped the leather. I stitched up the back and let it dry, then did an experiment and removed the leather, re-soaked it and added some simple leather tooling details. This worked OK though I may try to carefully measure the riser locations and do the tooling before applying the leather to the scabbard.
I dyed the 2mm leather cord a dark brown and restitched the back. Next time I will definitely skiv the leather and allow 3/8" of an inch overlap because the butted seam on the back looks a little amateur.
The suspension system will consist of two dark brown straps that run between each pair of risers.

2011-05-17

Custom Hand-and-a-Half Sword Handle


My first attempt fell a bit short. I was very pleased with the lacing effect the packaging twine had, but the leather shrunk considerably on the handle when it dried and came up short on the edges. I think the risers added about 1/4 inch additional length. Also, the lacing was twisted and looked sloppy. Growing weary of failure, I made multiple careful measurements and created a pattern to be used to cut the leather for this Hanwei Practical Bastard Sword. Also visible are the additional 2mm leather cord risers. I soaked the leather for about 1 minute in warm tap water, let it dry on a towel for a few minutes, poked twice the number of threading holes as before, and lace.
I will let it dry over night and will probably need to trim and re-lace the lower half, soak with a sponge and wrap with twine.

Wood Core Scabbard II


Rather than trying to chisel a hollow sheath out of two pieces of 1/4 inch poplar, I realized it would be much easier to build up the interior space using additional wood. The interior space is a little too thick but I will line the top with either lambs wool or leather. Once the wood core is assembled and glued I will be able to shape the cross section into an oval shape.

Leather Gorget Pattern


Scale is 1/4" squares. When cutting out each pattern, fold the pattern in half and cut so the sides left-to-right are equal. Included is the metal gorget (baseline) and leather gorget.

2011-05-14

Leather Belt


Brown leather, basic tooling, beveled and burnished edges, brass findings.

2011-05-13

Scabbard Wood Core


Both halves after chiseling and extensive sanding. Next step is trimming down to size and shaping exterior.

2011-05-11

Scabbard Wood Core


Step 1: Poplar wood, 1/4" thick, traced sword outline on both halves and chiseled out core. Next step will be sanding and shaping interior to ensure best fit.

2011-05-08

Embellished Mail Shirt


This mail shirt is an incredibly cool "canvas" for my next project. Mail was used from the time of the Romans through the Renaissance. The mail pictured here is not quite historically accurate because the rings are round instead of flat, and the rings are butted together instead of riveted (or welded) for added strength. The rings are 16 gauge, round wire, zinc plated, with 8mm inner diameter.
I had planned on lining the edges with leather or suede, and doing some Celtic, Saxon or Viking knot work using real leather cord. The leather could be folded over the edges and stitched through the rings. The mail is zinc coated to prevent rust but it should still be kept oiled, so I'm not sure how leather will work out with that. Maybe black or very dark brown leather, with a slightly lighter cord for the knot work?
I'm not quite sure what to do with this piece so I'm looking for comments, thoughts and suggestions.

2011-05-06

Sword and Scabbard


I decided to go with a brown scabbard with cranberry accents. The only things remaining are the two suspension straps (cranberry) but I don't have the correct rivets yet. Before and after photos.

Frankenscabbard


I need a smaller hole puncher thingy, but this actually looks better than I thought it would. If I had it to do over again I would have spent the extra $20 for a whole piece of leather. The back doesn't look so nice, however. I think in the future I will wrap the leather first, hold it in place with a few stitches during the molding process, then cut the seam down to size and stitch from the bottom up.

Custom Scabbard


Leather wrapped, (manufacturer) fiberglass core scabbard, molded and stitched. The suspension straps will go around both sides of the top fuller molding. The leather is from an $8 scrap bag and I had to stitch 4 pieces together to cover the length of the scabbard. Hopefully the stitching effect will look artistic and not end up evoking a Raggedy Ann motif.

2011-05-05

Custom Sword Handle


Removed existing fake leather handle. Cord wrapped, covered with leather, stretched and stitched, dyed cranberry and antiqued. Matching scabbard this to come.

2011-05-01